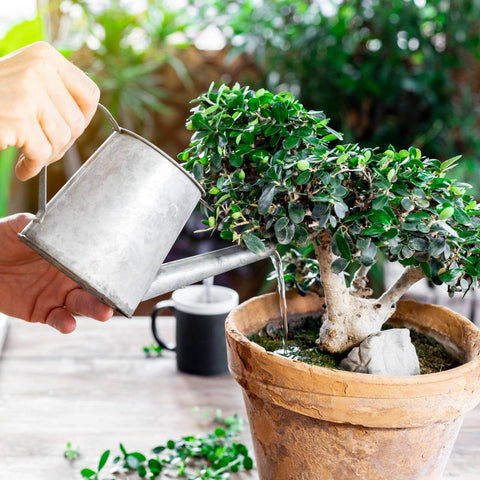
Bonsai is an ancient Japanese art of growing small trees and shrubs in special containers. This art requires patience, attention and precision to achieve the desired form and appearance of the plant. Growing bonsai is the creation of miniature natural landscapes that convey a sense of balance, peace and harmony.
🌿 The first steps in growing bonsai include choosing the right plant material. A variety of trees and shrubs can be used for bonsai, but not all plants can be successfully shaped in this style. Some of the most commonly used species include maple, pine, cypress, and Japanese maple. It is important to choose a plant that has suitable leaf and branch sizes for bonsai.
🌿 After selecting the plant, the shaping phase follows. The process of shaping a bonsai involves cutting and shaping the branches, roots, and leaves to achieve the desired appearance. This phase requires expertise and careful handling, as excessive cutting can damage the plant. Techniques such as wiring are used to shape the branches, while regular cutting and pruning are used to maintain the desired size and shape of the plant.
🌿 It is important to ensure proper care for bonsai to keep the plant healthy and beautiful. This includes regular watering, proper fertilization, and maintaining optimal soil moisture levels. It is also important to provide enough light for the plant, but avoid exposure to direct sunlight, which can damage the leaves and roots.
🌿 Growing bonsai also requires attention to seasonal changes. During the winter months, bonsai plants should be protected from the cold , and some species may require a dormant period. In spring and summer, plants should be regularly inspected and dead leaves or twigs removed .
🌿 Growing bonsai is not only a matter of physically shaping the plant, but also creating an artistic expression. Bonsai masters use the principles of balance, contrast, space and perspective to create a harmonious composition.
🌿 Bonsai art also involves the presentation of the plant in an appropriate container. Bonsai containers are carefully selected to highlight the beauty of the plant and create harmony between the plant and its environment. These containers are often handmade from ceramic and come in a variety of shapes and textures.
🌿 Growing bonsai is a process that requires patience and dedication . The plant develops over the years, and the bonsai master monitors its growth and shapes it according to his vision. Growing bonsai can be challenging, but at the same time very satisfying. It is an art that provides a deep experience of connecting with nature and creating something special.
🌿 Bonsai also carries a philosophical dimension. It reminds us of the transience of time, modesty and the beauty of simplicity. Looking at bonsai, we can find peace and a sense of balance. Uniting nature and human creation, bonsai teaches us the importance of patience, dedication and respect for life.
🌿 Bonsai cultivation has been passed down from generation to generation for centuries, preserving the traditions and values of Japanese culture. However, today it has become a global art that attracts people all over the world. Many countries and regions have their own styles of bonsai, reflecting local culture and landscapes.
🌿 Growing bonsai is an extremely creative process that allows for individuality and expression of one's own style. Each bonsai is unique and carries the story of its grower. Creating and nurturing bonsai requires dedication and love for nature, but it also brings incredible joy and satisfaction.
🌿 Growing bonsai is an art that reminds us of the beauty of nature and our ability to shape and nurture the world around us. It is a path of self-discovery and a deep connection with nature. Growing bonsai is not just about creating miniature trees, but also creating a space for contemplation, meditation and reflection.
🌿 Growing bonsai requires skill, knowledge, and patience, but it rewards us not only with the beauty of the miniature plant, but also with the peace we find while observing their growth and development.
Do you want to grow your own bonsai tree ?
You can find a set with seeds and all instructions for planting and growing here: https://gardenshop.hr/products/set-bonsaj-uzgoj-4-vrste-bonsaja
Preparation instructions
It is very important to properly prepare seeds for germination and further cultivation. Plant seeds have different characteristics and behave differently. Therefore, the preparation of individual seeds is of utmost importance. Read the instructions carefully.
🌿 JAPANESE BLACK PINE (Pinus Thunbergii)
The Japanese black pine is a classic bonsai tree species and is very popular in Japan. Pine species with short needles are best suited for bonsai. Black pines are very tolerant of poor conditions and survive in the wild on nutrient-poor soils. The tree has tough needles up to 12 cm (4'') long, which can be shortened with regular tweezers.
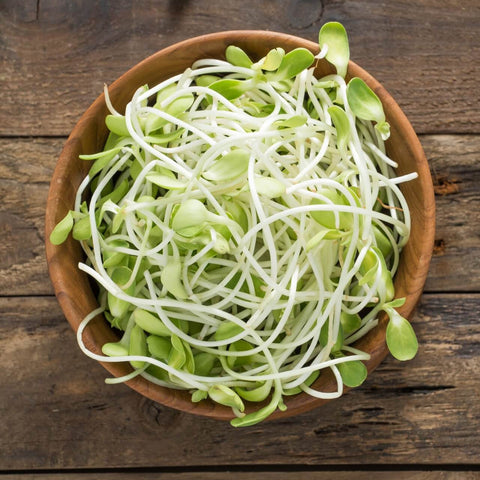
1. Soaking - Soak the seeds in water for 24 to 48 hours. It can be longer. It is important that the seed coat softens.
2. Preparation - After the seeds are well soaked, prepare the soil. Soak the coconut lozenges of compacted soil in water to swell. When the soil loosens, it creates 5 times the volume of soil. Fill the biodegradable pots with this soil.
3. Germination - Plant seeds in pots 1/8 inch deep in soil. Lightly tamp the soil around the seeds. Place the pots in a cool or other protected location. Make sure the soil is moist but not waterlogged. Germination usually takes 4 to 8 weeks, but may take longer, especially in cooler seasons.
4. Planting – Japanese black pine has a shallow root system, so it is best to plant it in a permanent location as soon as possible. Choose a location with full sun and well-draining soil. Plant the seedlings in the ground when they are between 2 and 4 cm tall. You can let the soil dry out on the surface between waterings, but do not let the seedlings dry out too much.
5. Bonsai – When the pine tree is 2-3 years old, your tree will be ready for bonsai cultivation. Read our online e-book for more information.
Watch the VIDEO HERE

🌿 WISTERIA TREE ( Wisteria sinensis)
Wisteria is a great choice for outdoor bonsai and adds a unique fragrance to your collection! As a deciduous climber, wisteria is relatively free from pests and diseases and can develop thick trunks very quickly.
1. Seed preparation procedure - Soak the seeds in water for 24 to 48 hours. It can be longer. It is important that the seed coat softens.
2. Preparation - Once the seeds are well soaked, prepare the soil. Soak the coconut pellets of compacted soil in water to swell. When the soil loosens, it creates 5 times the volume of soil. Fill the biodegradable pots with this soil.
3. Germination - Plant seeds in pots 1/8 inch deep in soil. Lightly tamp the soil around the seeds. Place the pots in a cool or other protected location. Make sure the soil is moist but not waterlogged. Germination usually takes 4 to 8 weeks, but may take longer, especially in cooler seasons.
4. Sun - Place the seeds (seed pots) in a sunny spot during the day. If you have to move the pots temporarily, partial shade should not harm the wisteria seeds. However, return them to the sun as soon as possible. Germination usually takes 4 to 8 weeks, but can take longer.
5. Planting – Place the containers in a warm, sunny spot. Plant the seedlings in the ground when they are between 2 and 4 cm tall. You can let the soil dry out on the surface between waterings, but do not let the seedlings dry out too much.
6. Bonsai - When your tree is 2-3 years old, your tree will be ready for bonsai cultivation. Read our online e-book for more information.
Watch the VIDEO HERE.

🌿 JAPANESE RED MAPLE ( Acer rubrum)
Red maple is one of the most commonly used deciduous tree species in landscaping due to its unique characteristics. Its slow growth allows for control over the volume of the tree throughout its life, it supports pruning well and maintains a typical crown shape. It grows into an umbrella shape that provides an incredible aesthetic effect in any household. Its silhouette is easily recognizable and stands out from other plants.
1. Seed preparation process - Place the seeds in a jar, cover with lukewarm water and let stand for 24 to 48 hours to soften the seed coats.
2. Stratification process (preparing seeds for better germination) - Remove the water and place the seeds in the original "ziplock" seed bag, and sprinkle them with water to keep the seeds moist to retain moisture inside the bag. Then place the bag of seeds in the refrigerator (not the freezer!) for 4 to 6 weeks.
To reduce the possibility of fungal growth, remove the seeds from the refrigerator and bag once a week; spray with distilled water, wipe the inside of the bag and the seeds, then return the seeds to the bag and place in the refrigerator.
3. Preparation - Soak the coconut lozenges of compacted soil in water to swell. When the soil loosens, it creates 5 times the volume of soil. Fill biodegradable pots with this soil.
4. Germination - Plant seeds in pots 1/8 inch deep in soil. Lightly tamp the soil around the seeds. Place the pots in a cool, sheltered spot. Make sure the soil is moist, but not waterlogged. Germination usually takes 4 to 8 weeks , but can take longer.
5. Planting – Place the containers in a warm, sunny spot. Plant the seedlings in the ground when they are between 2 and 4 cm tall. You can let the soil dry out on the surface between waterings, but do not let the seedlings dry out too much.
6. Bonsai – When your tree is 2-3 years old, your tree will be ready to grow into a bonsai. Read our online e-book for more information.
Watch the VIDEO HERE .

🌿 JUDAS TREE ( Cercis Siliquastrum)
Cercis siliquastrum, commonly known as the Judas tree, is a small deciduous tree native to southern Europe and western Asia known for its profuse dark pink flowers in spring. There is a long-standing myth that Judas Iscariot hanged himself from such a tree.
1. Seed preparation procedure - Soak the seeds in lukewarm water for 24 to 48 hours. It can be longer. It is important that the seed coat softens. The seeds should swell. If not, remove the outer coating from the seeds and soak them in room temperature water for another 12 to 24 hours.
2. Stratification process (preparing seeds for higher germination) - Remove the water and place the seeds in the original "ziplock" seed bag, and spray them with water to keep the seeds moist inside the bag. Then place the bag of seeds in the refrigerator ( not the freezer!) for 4 to 6 weeks.
To reduce the possibility of fungal growth, remove the seeds from the refrigerator and bag once a week; spray with distilled water, wipe the inside of the bag and the seeds, then return the seeds to the bag and place in the refrigerator.
3. Preparation - Soak the coconut lozenges of compacted soil in water to swell. When the soil loosens, it creates 5 times the volume of soil. Fill biodegradable pots with this soil.
4. Germination - Plant seeds in pots 1/8 inch deep in soil. Lightly tamp the soil around the seeds. Place the pots in a cold frame or other protected location. Make sure the soil is moist, but not waterlogged. Germination usually takes 4 to 8 weeks , but can take longer.
5. Planting – Place the containers in a warm, sunny spot. Plant the seedlings in the ground when they are between 2 and 4 cm tall. You can let the soil dry out on the surface between waterings, but do not let the seedlings dry out too much.
6. Bonsai - When your pine tree is 2-3 years old, your tree will be ready for bonsai cultivation. Read our online e-book for more information.
Watch the VIDEO HERE .

🌿 SILK MIMOSE ( Albizia julibrissin)
Growing a silk mimosa tree can be worthwhile as a bonsai tree alone. These trees produce silky flowers and leaves that look like marbles. The silk tree is very easy to grow and forgiving. They need plenty of water to maintain moisture; they can even withstand short periods of drought. Mature trees open into a beautiful V shape and make excellent bonsai trees.
1. Scarification process - mimosa seeds have a very hard shell, which makes it difficult for water to penetrate the core and thus promote germination. So take a small pair of scissors or a knife and scrape the outer shell until you can see the inner core. You can also make a small incision to expose the inner core, but be very careful not to cut through the inner core (just the brown skin).
2. Watering - Place the seeds in a glass, pour lukewarm water over them and let them sit for 24 hours. After 24 hours, the seeds should have doubled in size.
3. Preparation - Soak coconut lozenges of compacted soil in water to swell. When the soil loosens, it creates 5 times the volume of soil. Fill biodegradable pots with this soil.
4. Germination - Plant the seeds in pots 1/4 inch deep in the soil. Lightly tamp the soil around the seeds. Place the pots in a warm or other protected location. Keep the soil moist, but not wet. Germination usually takes 2 to 3 weeks , but may take longer.
5. Transplanting - Once the seeds have germinated, it is recommended to separate them and plant them in larger pots to avoid competition.
6. Planting - Choose a location with full sun and well-drained soil. Plant the seedlings in the ground when they are 2 to 4 cm tall. The soil on the surface can dry out between waterings, but do not allow the seedlings to become too dry.
7. Bonsai – when your mimosa tree is 2-3 years old, it will be ready to grow into a bonsai. Read our e-book for more information.
🌿 FLAMING WOOD ( Delonix regia)
The flame tree or Delonix regia is a species of low-growing plant in the bean family. It is known for its fern-like leaves and low, marl-shaped flowers. In many tropical parts of the world, it is grown as an ornamental tree, and in English it is called royal Poinciana or flamboyant. The flowers appear after a few years in a fiery red color.
1. Soaking - Soak the seeds in lukewarm water for 24 to 48 hours . It can be longer. It is important that the seed coat softens.
2. Scarification Process - Firewood seeds have a very hard shell, which makes it difficult for water to reach the kernel and thus promotes germination. Try to peel the outer shell of the seed if possible. As you can see, sometimes this is very difficult to do. Use scissors or a knife to cut off a small portion of the outer shell of the seed. Be careful not to cut or damage the seed core.
3. Second Soak - Soak the seeds in water again for 12 to 24 hours.
4. Soil preparation - Soak coconut lozenges of compacted soil in water to swell. When the soil loosens, it creates 5 times the volume of soil. Fill biodegradable pots with this soil.
5. Planting - Plant seeds in pots 1/4 inch deep in the soil. Plant the seeds in the soil and press lightly around the seeds. Place the pots in a warm or other protected location. Keep the soil moist but not wet. Germination usually takes 2 to 3 weeks, but may take longer.
6. Transplanting - Once the seeds have germinated, it is recommended to separate them and plant them in larger containers to avoid competition.
7. Planting - Choose a location with full sun and well-drained soil. Plant the seedlings in the ground when they are 2 to 4 cm tall. The soil on the surface can dry out between waterings, but do not allow the seedlings to become too dry.
8. Bonsai – when your flamingo is 2-3 years old, the tree will be ready to grow into a bonsai. Read our e-book for more information.
Watch the VIDEO HERE.

🌿 JACARANDA (Jacaranda mimosifolia)
The Jacaranda is a subtropical tree native to South America that boasts clusters of fragrant purple flowers in fringes. The Jacaranda tree is successfully grown as a popular ornamental tree for its beautiful and long-lasting blue flowers. It is resistant to diseases and pests and is moderately drought tolerant. The Jacaranda is often used in bonsai for its bright flowers, fern-like foliage, and tree shape.
1. Soaking - Place the seeds in a glass or other container, pour Luke's warm water over them, and let stand for 24 hours to soften the seed shells.
2. Preparation - Soak the compacted soil pellets included in the kit in plenty of water for 5-10 minutes. Once the soil has settled, add it to the included biodegradable containers.
3. Planting - Plant the seeds in pots 1/4 cm deep in the soil. Lightly pack the soil around the seeds.
4. Watering - Keep the soil moist, but not too wet. The roots of the jacaranda should be slightly damp. If it dries out, the leaves will shrivel, turn brown and fall off; if it is too wet, the leaves will yellow and fall off. Germination usually takes one to two months, but can take longer.
5. Placement - Place the containers in a warm or other protected location. Jacaranda needs a lot of light and must be protected from lower temperatures. Jacaranda can be placed outside in a sunny spot or in partial shade by the end of May.
6. Fertilization - Fertilize weak trees year-round, using bonsai fertilizer every week during the growing season, once every two weeks in winter.
7. Transplanting - Once the seeds have germinated, it is recommended to separate them and plant them in larger pots to avoid competition.
8. Planting outdoors - Choose a location with full sun and well-drained soil. Plant the seedlings in the ground when they are 2 to 4 cm tall. The surface soil can dry out between waterings, but you should not allow the seedlings to become too dry.
9. Bonsai – when your jacaranda is 2-3 years old, it will be ready to grow into a bonsai tree. Read our e-book for more information.
10. Pruning and wiring - Jacarandas grow vigorously. When four or five new shoots have grown, shorten them to one or two pairs of leaves. Wire the young shoots when they start wiring. Mature trees need little pruning.
11. Repotting – repot the Jacaranda every other year in the spring. Our bonsai potting soil is a well-drained organic commercial potting soil that performs very well when transplanted.
12. Pests and diseases - Jacaranda is sometimes attacked by scab. Using a special oil-based insecticide can help reduce scab.
🌿 Pomegranate (Punica granatum)
Pomegranate is one of the most popular species of cultivated bonsai. The pomegranate has a rich historical and mythical story. The leaves are upright or oblique, shiny and narrowly oblong. Native to the Mediterranean and Asia, the pomegranate is a popular choice for growing as a bonsai tree.
1. Soaking - leave the seeds soaked in a glass of warm/room temperature water for 24 hours.
2. Cleaning - if you notice soft pulp on the seeds after soaking, scrape it off with a needle. Wash the seeds.
3. Preparation - Soak the compacted soil pellets included in the kit in plenty of water for 5-10 minutes. Once the soil has settled, add it to the included biodegradable containers.
4. Planting - Plant the seeds in pots 1/4 cm deep in the soil. Lightly tamp the soil around the seeds.
5. Watering - Make sure the soil is moist, but not too wet. Water the dwarf pomegranate when the soil feels dry. When the flowers open and in summer, the tree needs more water than usual. Avoid watering with lime water.
6. Location - Pomegranates need warm temperatures and are frost intolerant. Warm temperatures are KEY to success! Keep the seeds in a warm place at all times (usually placing the container on a thick towel and a heater or water heater is enough, but keep in mind that the seeds may die if it is too hot. Germination usually takes two or three weeks, but it can take longer.
7. Fertilization - Fertilize weak trees year-round, using a bonsai fertilizer weekly during the growing season. Do not fertilize the tree during flowering.
8. Transplanting - Once the seeds have germinated, it is recommended to separate them and plant them in larger pots to avoid competition.
9. Planting outdoors - Choose a location with full sun and well-drained soil. Plant the seedlings in the ground when they are 2 to 4 cm tall. The surface soil can dry out between waterings, but you should not allow the seedlings to become too dry.
10. Bonsai - When your pomegranate is 2-3 years old, it will be ready to grow into a bonsai tree. Read our e-book for more information.
11. Pruning and wiring - Pruning is best done during winter dormancy when there are no leaves to get in the way. If you want flowers to develop, do not prune the shoots before flowering.
12. Transplanting – transplant the pomegranate every second to third year in the spring. Our bonsai potting soil is a well-drained organic commercial potting soil that performs very well when transplanted.
13. Pests and Diseases - Normally, healthy pomegranate trees are hardy to pests and diseases. Frequent watering with lime water can cause chlorosis.
🌿 EUCALYPTUS TREE (Eucalyptus)
Eucalyptus has attractive blue evergreen leaves that are wonderfully aromatic. The peeling bark comes in a variety of colors such as red, green, blue, cream, gray and brown, which gives it added interest and makes it an excellent tree to grow all year round. Eucalyptus is also widely used in herbal and modern medicine.
1. Soaking - leave the seeds soaked in a glass of warm/room temperature water for 24 hours.
2. Stratification process - drain the water and place the seeds in the original ziplock bag that comes with some soil to retain moisture. It should be moist all the time and have some air space. Then place the ziplock bag of seeds in the refrigerator (not the freezer) for 8-12 weeks.
3. Preparation - Soak the compacted soil pellets included in the kit in plenty of water for 5-10 minutes. Once the soil has settled, add it to the included biodegradable containers.
4. Planting - The seed mixture should be sown on the surface of the soil, and then preferably covered with a fine layer of sand. Just make sure the seeds are not exposed to light.
5. Watering - Make sure the soil is moist but not too wet. Bonsai eucalyptus needs plenty of water during the growing season when in full sun. If your tap water is very chalky, use rainwater instead. Germination usually takes 1 to 2 months, but can take longer.
6. Location - Eucalyptus likes a spot in full sun and many can withstand intense heat. Eucalyptus is not cold hardy, so during cold winters it should be kept in a frost-protected room or even indoors.
7. Fertilization - Fertilize weak trees year-round, using a bonsai fertilizer weekly during the growing season. Do not fertilize or fertilize less frequently in winter.
8. Transplanting - Once the seeds have germinated, it is recommended to separate them and plant them in larger pots to avoid competition.
9. Planting outdoors - Choose a location with full sun and well-drained soil. Plant the seedlings in the ground when they are 2 to 4 cm tall. The surface soil can dry out between waterings, but you should not allow the seedlings to become too dry.
10. Bonsai – When your eucalyptus is 2-3 years old, it will be ready to grow into a bonsai tree. Read our e-book for more information.
11. Pruning and wiring - wait until new shoots have matured before pruning. Regular heavy pruning is not a problem for eucalyptus due to its vigorous growth. Eucalyptus can be wired, but be sure to remove the wire in time.
12. Transplanting – transplant the pomegranate every second to third year in the spring. Our bonsai potting soil is a well-drained organic commercial potting soil that performs very well when transplanted.
13. Pests and Diseases – Caterpillars, grasshoppers and many animals like to feed on young eucalyptus leaves. Remove pests by hand or use special pesticides.